
The t-shirt mockup you will create today is fully editable, to scale, and accurate to real-life garment colors.
Watch the video below for a quick and easy tutorial. If you want to go more in depth and learn even more, follow the steps below.

Lets begin!
How to create a t-shirt mockup
Prep work - What you need to start
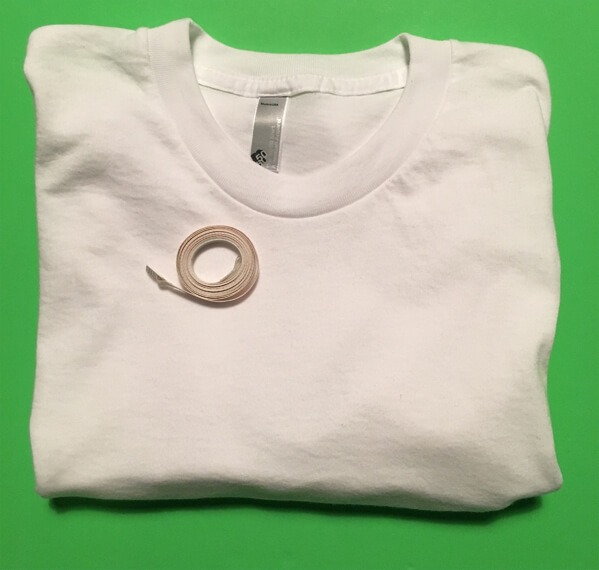
- A blank t-shirt, or image of a blank t-shirt, preferably white. You can use my source file here :D if you can't find one.
- (Optional) Colored poster board for a background - I chose green.
- An iPhone or good quality camera.
- (Optional) Measuring tape.
How to create a t-shirt mockup
Prep work - Choose a garment
For this t-shirt mockup I'm using the American Apparel Poly/Cotton Tee. If you own an American Apparel shirt, chances are this is already in your closet.

How to create a t-shirt mockup
prep work - Photographing
- Lay your garment out (preferably on a solid color background), and get some good wrinkles.
- Make sure lighting is even and stand over your t-shirt to snap a few good shots.
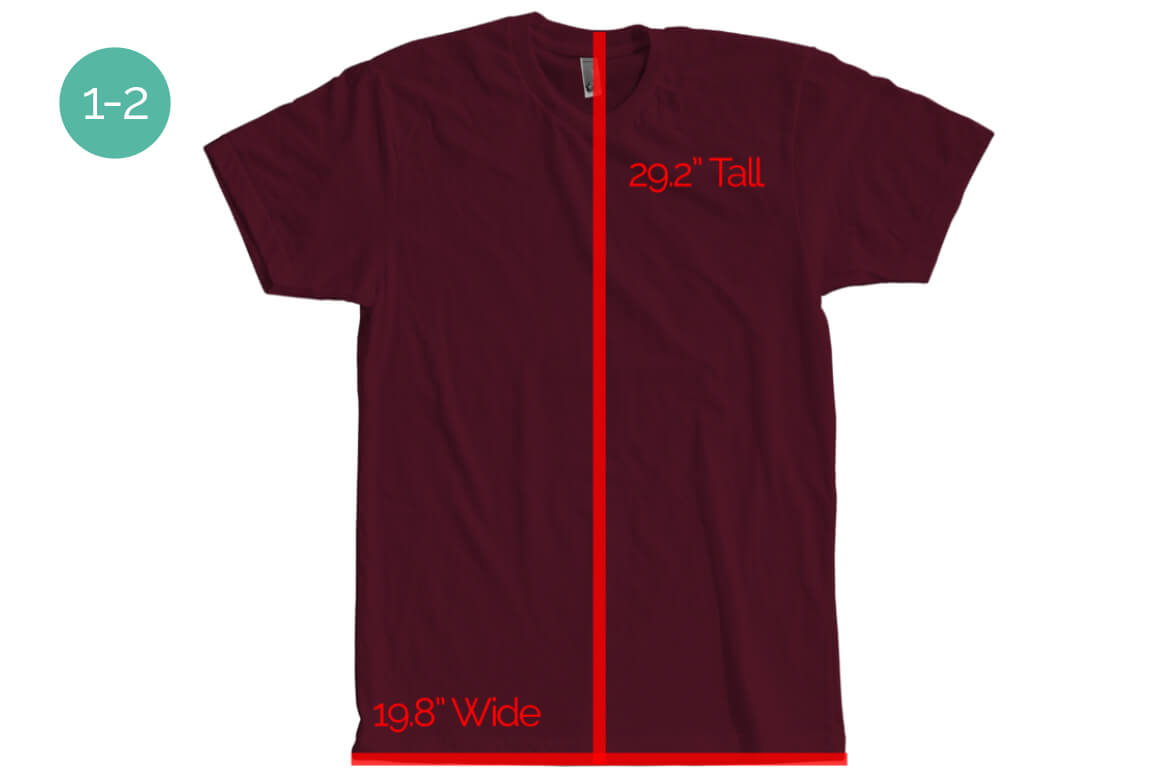
- Without moving the garment, measure the width at the bottom, and then the height from top to bottom. Save these dimensions.

How to create a t-shirt mockup
Part 1 - separating the garment
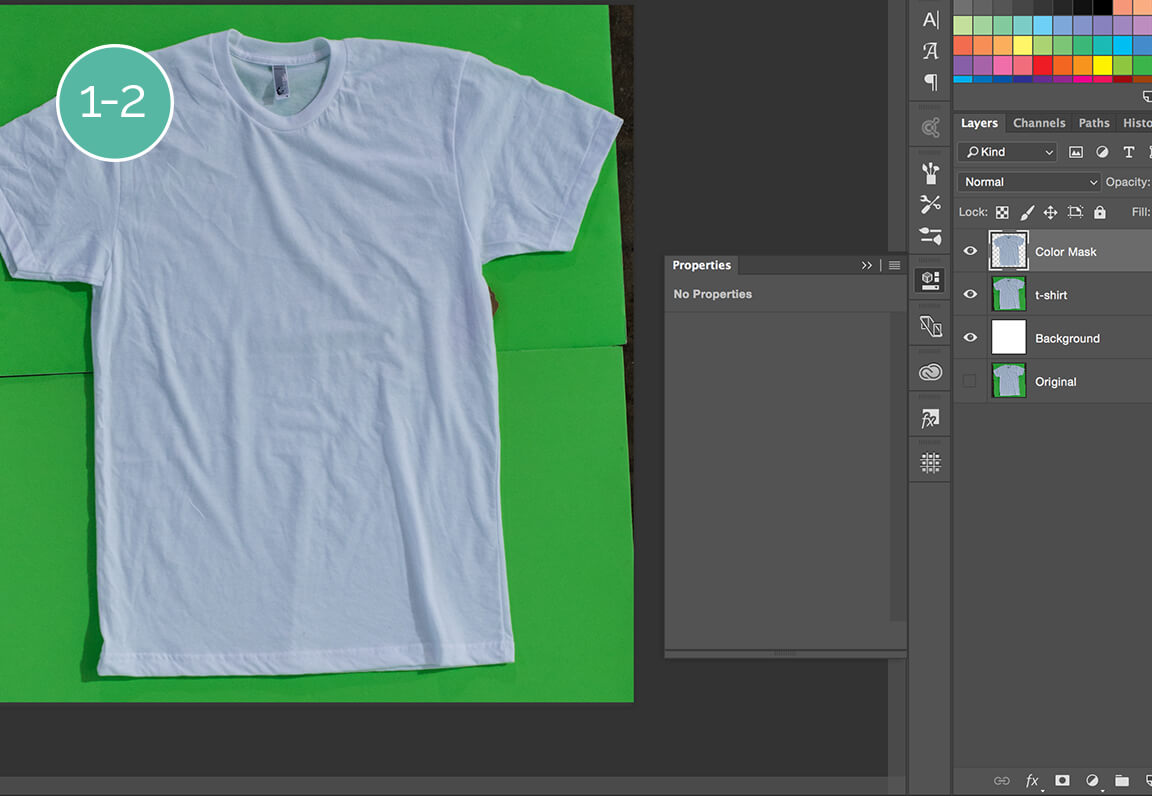
1. Open your best photo in photoshop and duplicate Cmd+J your background. Rename it "t-shirt". Hide the original background image and name it "Original" in case we need it later.
2. Create a blank layer Cmd+Shift+Alt+N, name it background. Make sure foreground is set to white and then fill Alt+Backspace the background.
3. Grab your pen tool P and create an outline of the garment. Make sure your on the "t-shirt" layer.
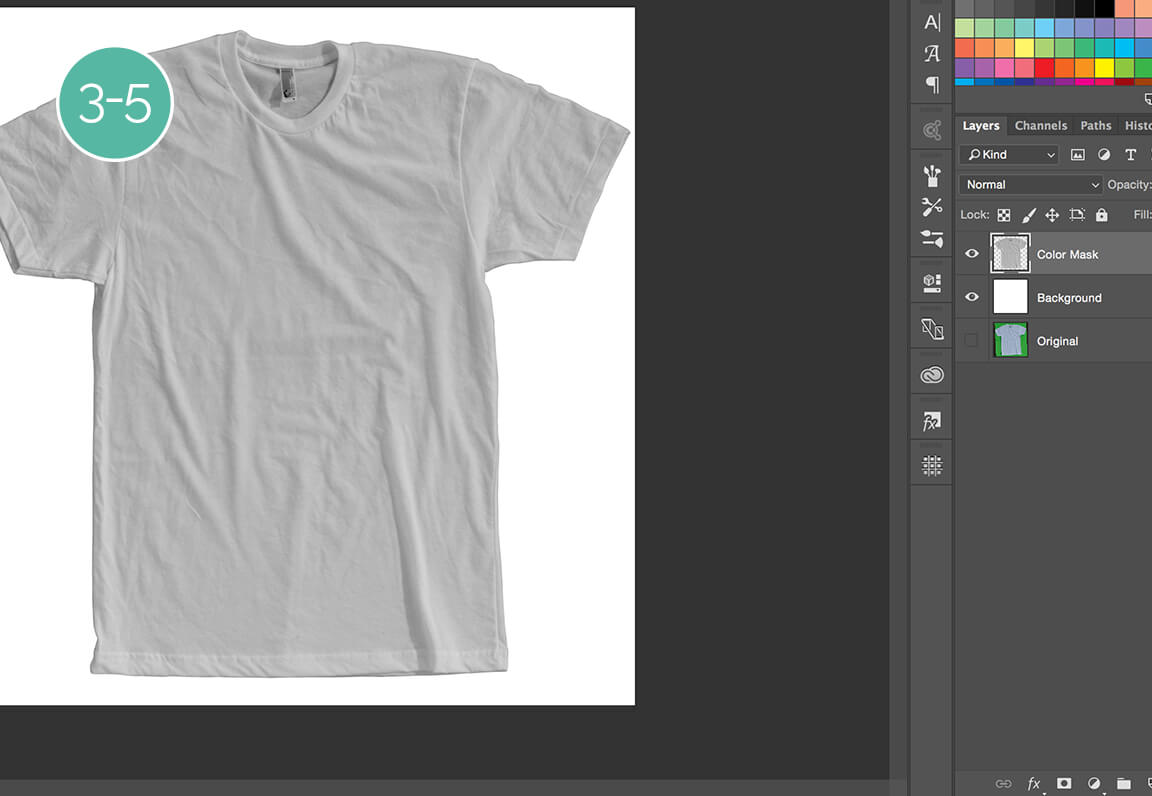
4. With the pen tool active, right click the outline and make selection, then Cmd+J to duplicate your selection. Delete the "t-shirt" layer. Rename the duplicated layer "Color Mask".
5. Desaturate Cmd+Shift+U the cut out shirt - this removes any colors not black or white.
6. Bring up the Image size dialogue Cmd+Alt+i and change the resolution to 72. Leave resample unchecked.
How to create a t-shirt mockup
Part 2 - Removing the tag
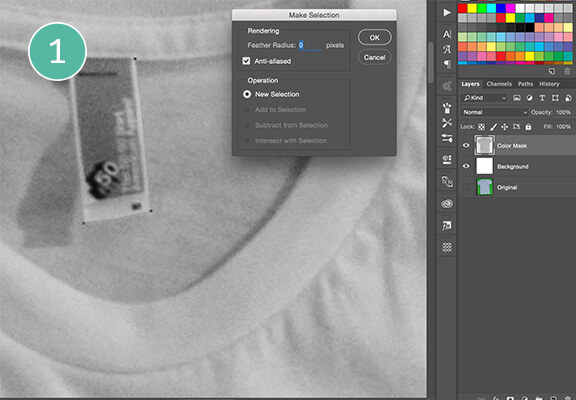
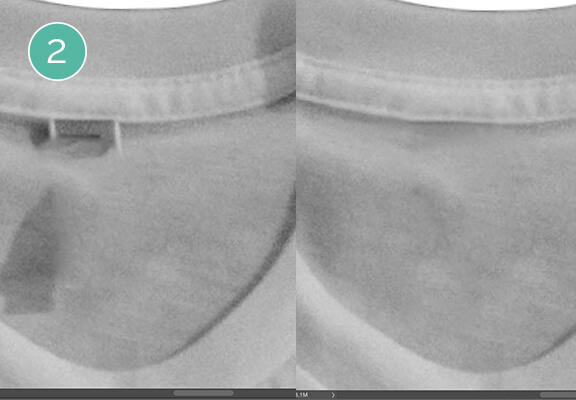
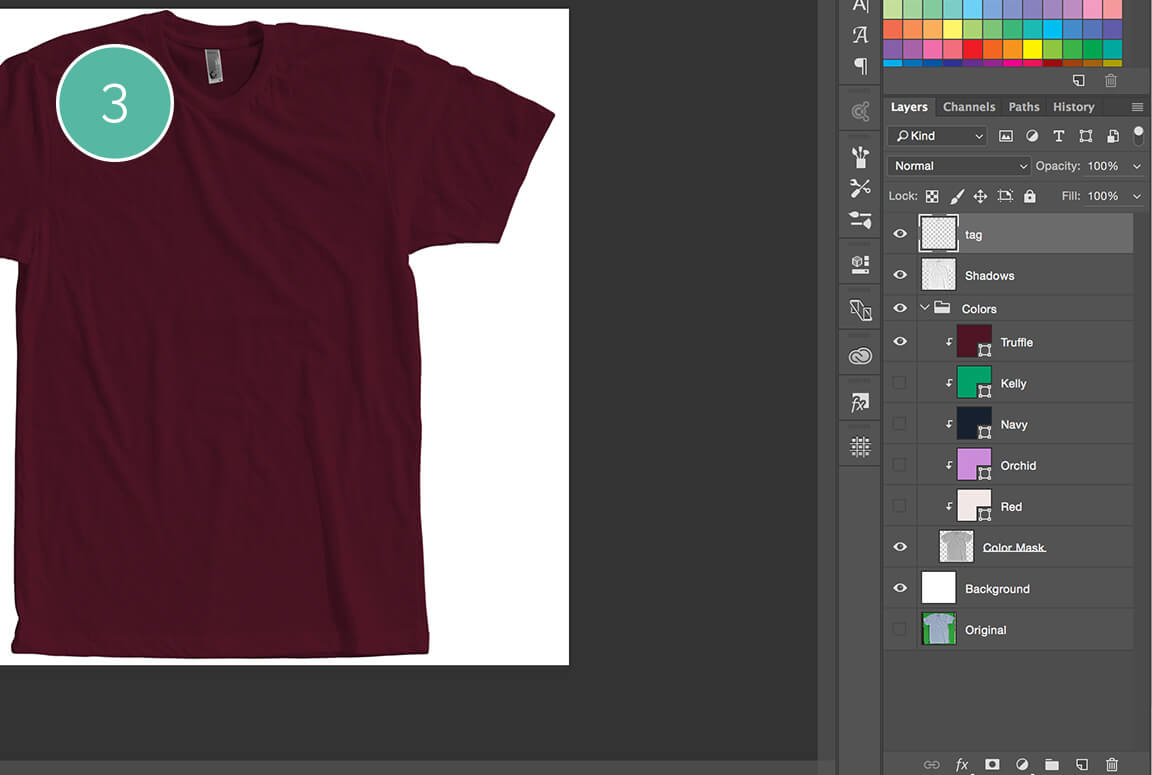
1. Grab your pen tool P and create an outline of the tag. Make sure your on the "Color Mask" layer.
With the pen tool active, right click the outline and make selection, then Cmd+J to duplicate your selection. Rename the duplicated layer "Tag".
2. On the "t-shirt" layer, bring up the stamp tool S. Sample fabric around the tag and proceed to stamp over the tag until happy. I use the brush hardness and opacity to blend seamlessly.
How to create a t-shirt mockup
PART 3 - CREATING BELIEVABLE SHADOWS
Creating life-like t-shirt mockup shadows take some finesse, it's different for every garment.
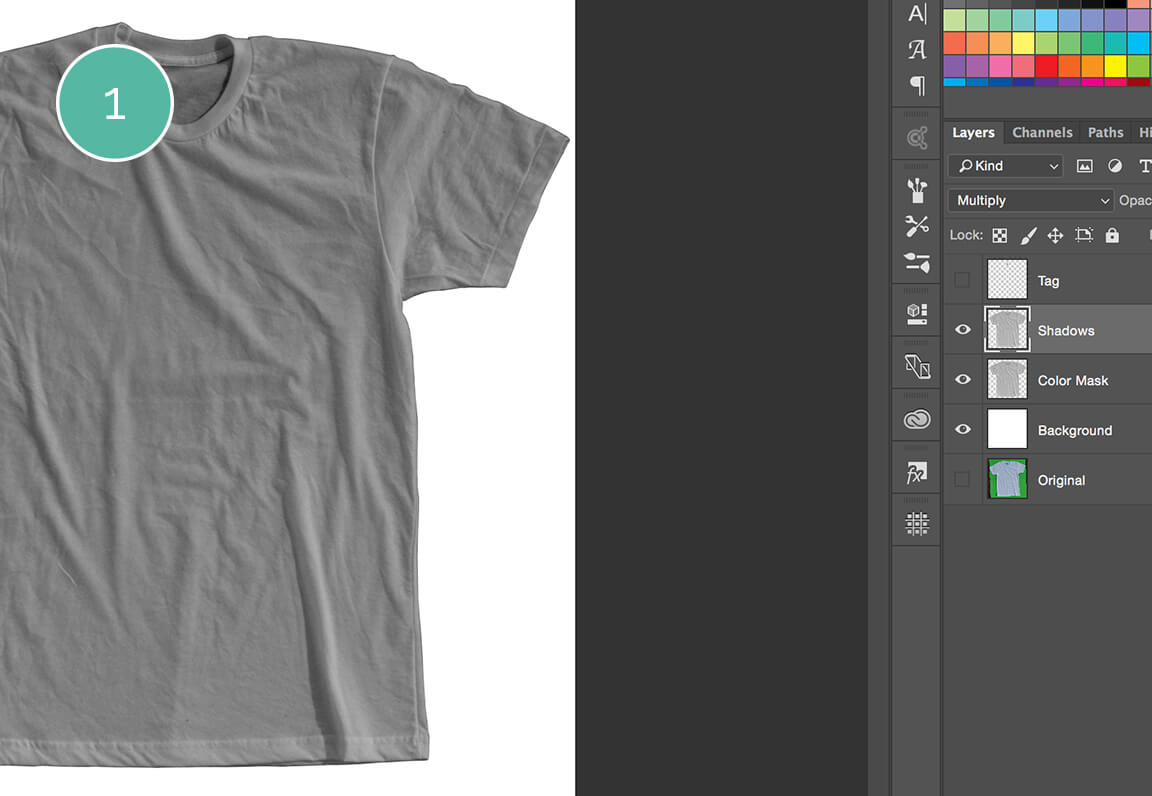
1. Duplicate the "Color Mask" layer Cmd+J and rename it "Shadows". Set the blending mode to Multiply.
2. Bring up the square shape Cmd+U and cover the entire shirt. Choose bright red ff0000 for the shape color. Rename this layer "Red" and move it between the "Shadows" and "Color Mask" layer.
3. Next clip the "Red" layer to the "Color Mask" layer by hovering your cursor between the 2 layers and hitting Alt+Click. MAGIC!
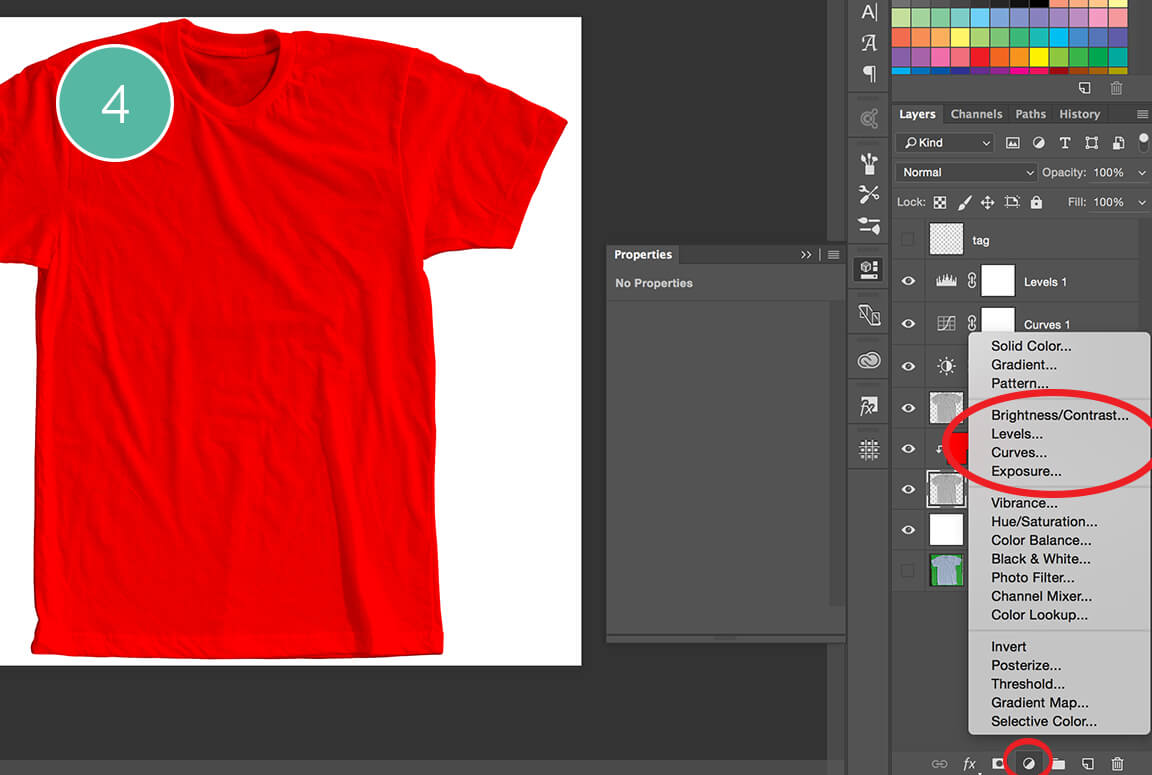
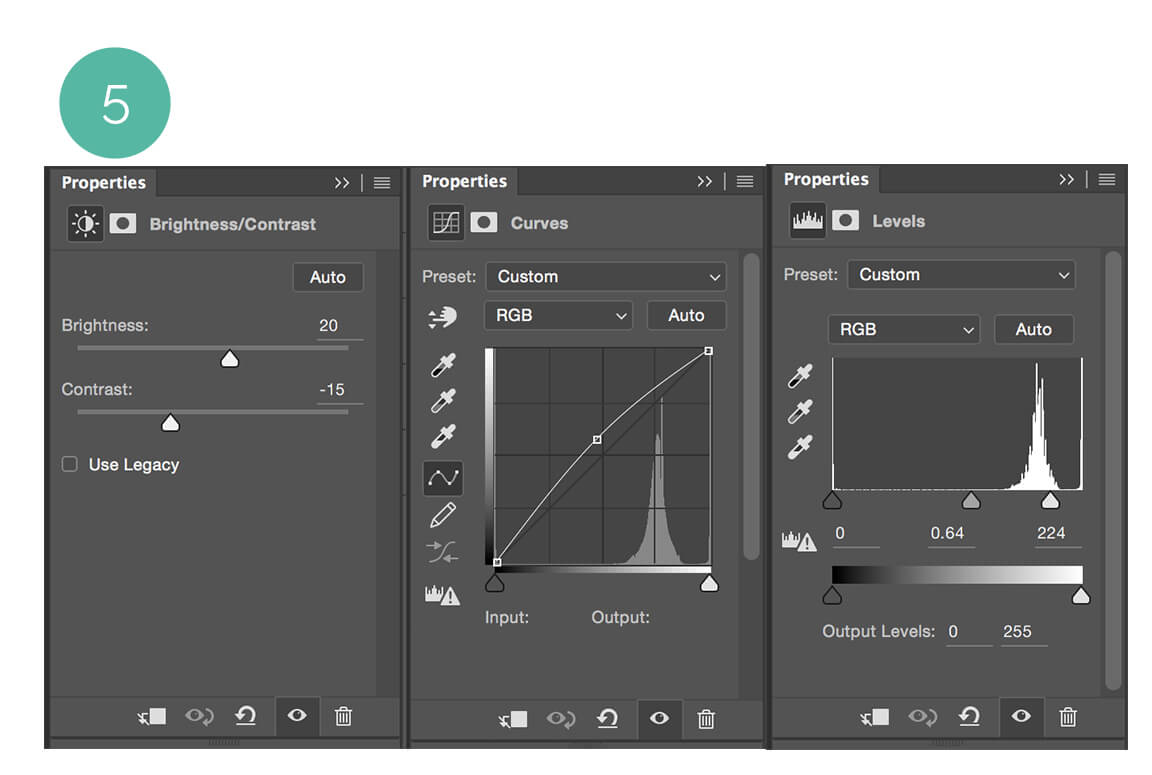
4. Select your "Shadow" layer, and through the icon at the bottom of the layers panel, add Brightness/Contrast first, Curves second, and Levels third.
5. See the settings I used to the right. The t-shirt mockup should look believable as a bright red, white, and black.
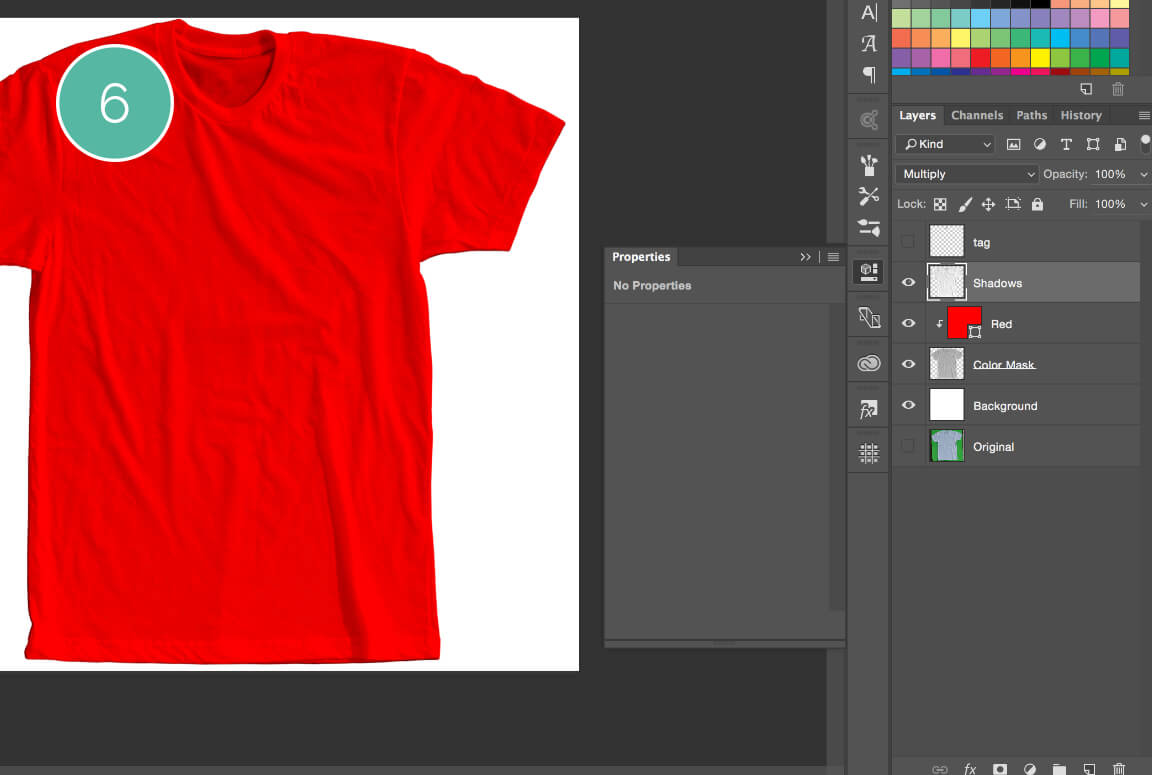
6. Select adjustments and "Shadows" layers then merge Cmd+E, set blend mode to Multiply and re-name "shadows".
Now from here, you're essentially done. You could place your art below the shadows and voila, you have a great mock. If you want to go one step further and and learn a thing or two, keep reading.
.
How to create a t-shirt mockup
part 4 - Garment colors
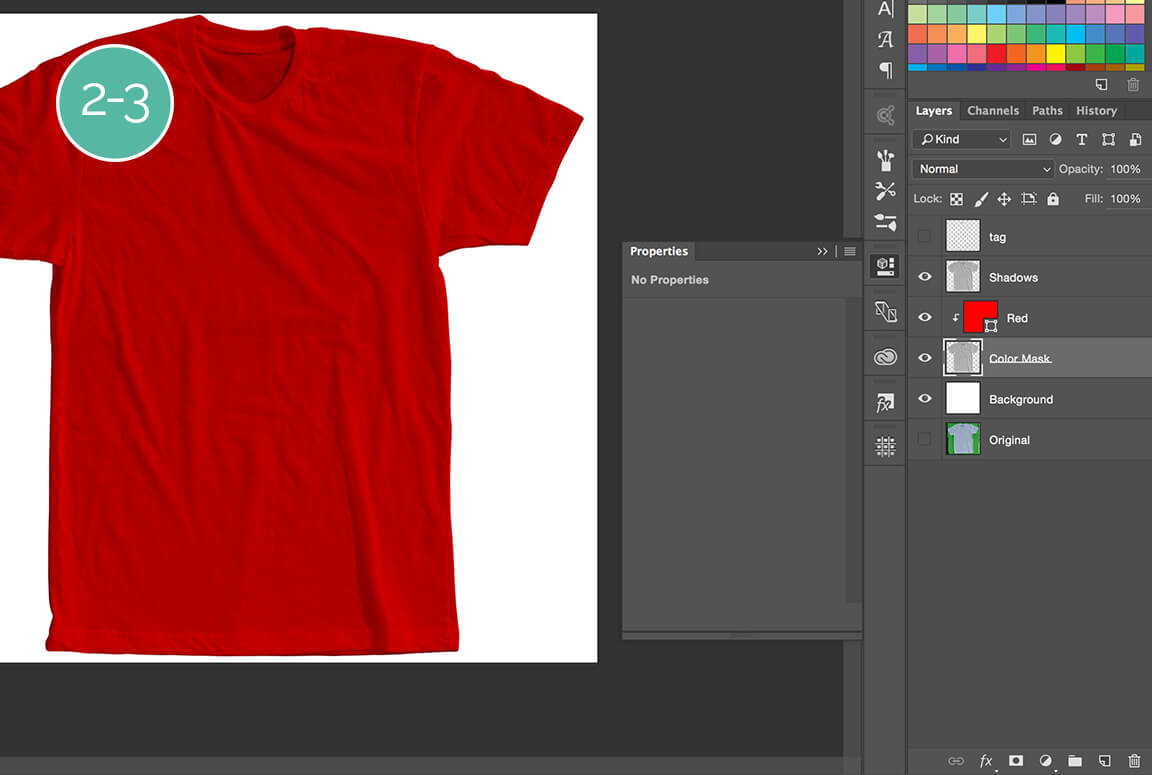
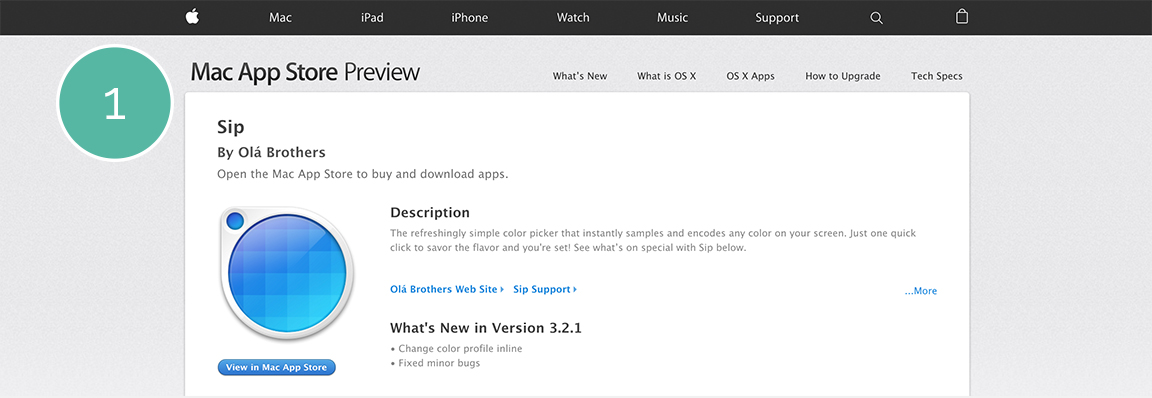
1. Download the app SIP, we need it to grab colors from various places.
2. Go to the American Apparel Poly/Cotton page. Bring up SIP Ctrl+Alt+P, and hold Cmd when selecting a color - this sends the sampled color to Photoshop as your foreground.
3. Go to Photoshop, select your "Red" layer and fill the layer Alt-Delete to replace the shape color with your new foreground color. SUCH AMAZE.
To add more colors, Duplicate Cmd+J the shape layer, clip to shape layer beneath, SIP a new color, Alt-Delete to replace the shape color & repeat. MUCH WOW.
Go ahead and grab your garment colors and "Color Mask" layer and group Cmd+G them. Rename Colors.
*Pro-tip: use alt+delete for changing text color too.

How to create a t-shirt mockup
part 5 - creating the shirt to scale
We're going to create this garment to scale so you can provide accurate life-like t-shirt mockups for printers, customers, and yourself.
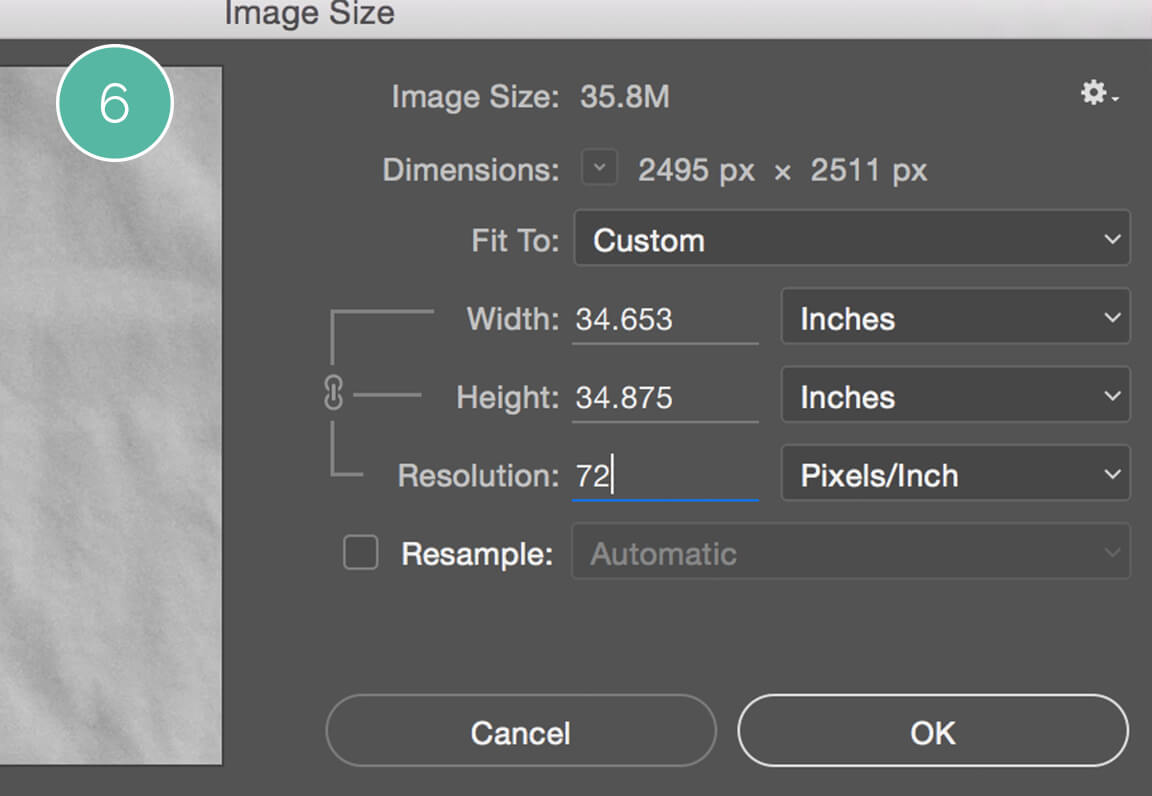
1. Get your dimensions from earlier. Create a horizontal rectangle the width of your shirt, and a vertical rectangle the height of your garment.
2. Fit your garment to the width & height. DONE! Now you can place your artwork on a shirt and know the exact size.
Congratulations, you've now learned how to create a t-shirt mockup!
Thanks for your interest in learning how to create your own t-shirt mockup. The graphic design skills you learn here are invaluable not only to the t-shirt mockup tutorial today, but for graphic design in real life scenarios.


Fix the common "Missing Fonts" issue!